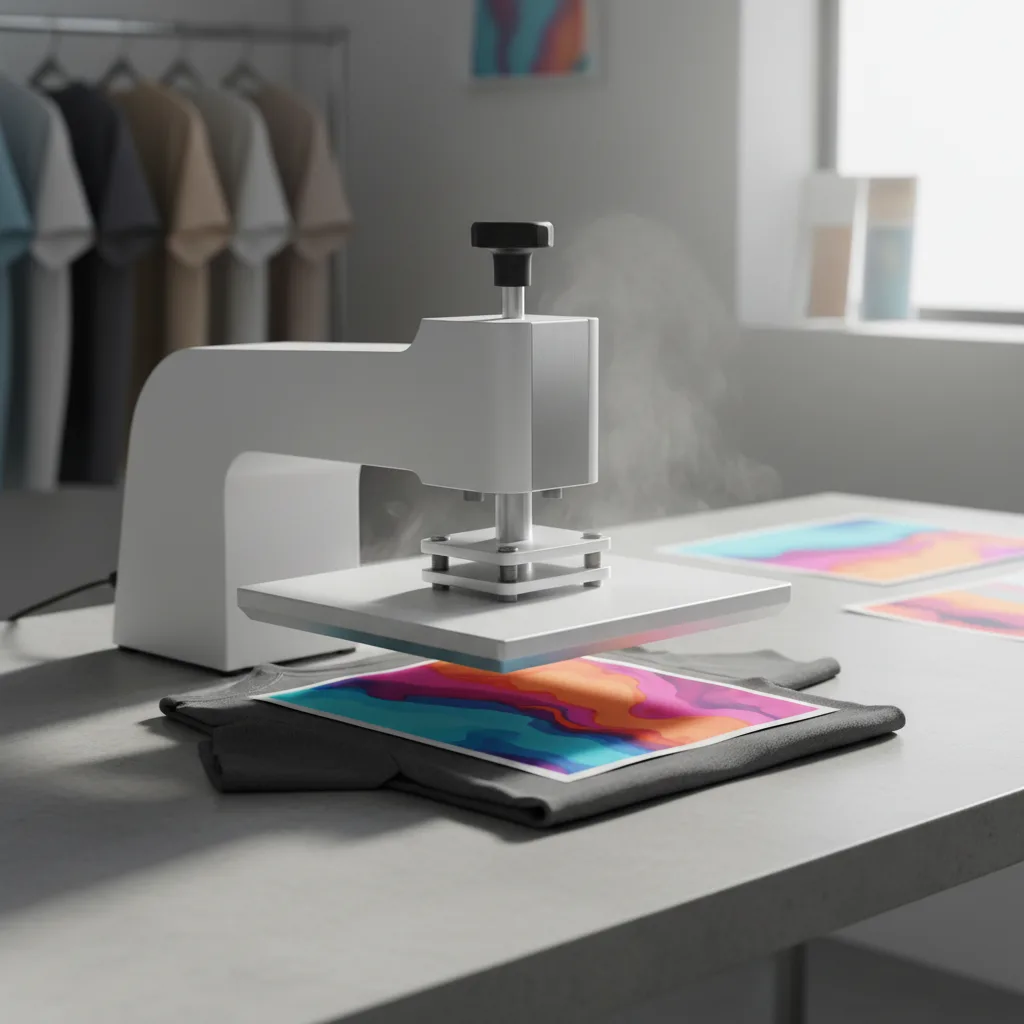
Equipment You Need
Before pressing your first DTF transfer, make sure you have the right equipment. Skipping this step or trying to use substitutes is the number one cause of failed presses.
Heat Press (Required)
A dedicated heat press is non-negotiable for consistent DTF results. You have two main options:
- Clamshell press — Opens like a clamshell. More compact, typically less expensive ($150–$300). Good for flat garments. The pressure distribution can be uneven on thicker items.
- Swing-away press — The upper platen swings to the side. Gives you full access to the lower platen for positioning and protects your hands. Better pressure consistency. ($200–$500)
Do not use a household iron. Irons cannot maintain precise temperatures, cannot apply consistent even pressure across the entire design, and will result in transfers that lift, peel, or have cold spots where the adhesive did not fully activate.
Other Supplies
- Lint roller — Remove lint and debris from the garment before pressing
- Teflon sheet or parchment paper — Protects transfers and press platens during final press
- Ruler or centering tool — For accurate placement
- Heat-resistant tape — Optional, for holding transfer in place during positioning
- Thermometer — Verify your press is reaching the correct temperature (many presses read 15–30°F off)

Preparing Your Garment
Garment preparation is a step that many beginners skip entirely, but it has a measurable impact on transfer adhesion and longevity.
Pre-Wash Your Blanks
New garments often have sizing, starch, or other finishing chemicals applied during manufacturing. These chemicals act as a barrier between the adhesive and the fabric fibers. Washing the garment once before pressing removes these chemicals and improves adhesion significantly. If you are pressing onto a garment a customer brings in, ask whether it has been washed.
Pre-Press the Garment
This is the most commonly skipped step and one of the most important. Before placing your transfer, press the garment alone for 3–5 seconds at your pressing temperature. This accomplishes two things:
- Removes moisture from the fabric (moisture can cause adhesion failure and steam bubbles)
- Eliminates wrinkles for a flat pressing surface
Even a small amount of trapped moisture in the fabric can create steam during pressing, which lifts the transfer from the inside and causes bubbling or partial adhesion. Pre-pressing eliminates this risk.
Lint Roll the Print Area
Use a lint roller on the exact area where the transfer will be placed. Any lint, dust, or pet hair caught under the transfer will create a small bump that prevents that area from bonding correctly. On dark garments, lint under a transfer is visible as a light-colored bump.
Heat Press Settings
DTF transfers from ColorFuse Prints press at the following settings:
| Setting | Recommended Value | Notes |
|---|---|---|
| Temperature | 305°F (152°C) | Range: 280–320°F depending on fabric |
| Time | 12–15 seconds | Thicker fabrics need the higher end |
| Pressure | Medium-firm | About 40–60 PSI — firm but not crushing |
| Peel | Cold peel | Wait 15 seconds after pressing before peeling |
Adjusting for Fabric Type
Different fabrics have different heat tolerances and thicknesses that affect pressing:
- 100% cotton t-shirt — Standard settings (305°F / 12 sec)
- 100% polyester — Lower temperature (285–295°F) to avoid scorching or glazing the fabric
- 50/50 blend — Standard settings, slightly shorter time to protect polyester content
- Heavy fleece or hoodie — Standard temperature, increase time to 15 seconds for heat to penetrate
- Nylon — Lower temperature (270–280°F), test first — nylon scorches easily
Step-by-Step Application
1. Heat Up Your Press
Turn on your heat press and allow it to fully reach temperature. Most presses take 3–5 minutes to stabilize. Do not start pressing while the press is still heating up — temperature inconsistency during pressing causes uneven adhesion.
2. Pre-Press the Garment
Place the garment on the lower platen, smooth it flat, and press for 3–5 seconds with light pressure. Remove any wrinkles, especially in the print area.
3. Position the Transfer
Place the DTF transfer on the garment with the ink side (shiny/printed side) facing down against the fabric. The film should be face down, carrier side up. Use a ruler or centering tool to get the placement exactly where you want it before pressing. Once the press closes, repositioning is not possible.
Standard placement guidelines for t-shirts:
- Center chest designs: 3–4 inches below the collar
- Left chest designs: 7–9 inches from the left shoulder seam, 3–4 inches below the collar
- Full-front designs: Center horizontally, start at 3 inches below collar
4. Close the Press and Apply Pressure
Lower the upper platen and apply medium-firm pressure. Set your timer for 12–15 seconds. Do not open the press during this time. Consistent pressure and time are critical.
5. Open Press and Wait Before Peeling
When the timer goes off, open the press and allow the garment to cool for 10–15 seconds before touching the transfer film. This cooling period is the peel wait time for cold-peel transfers.
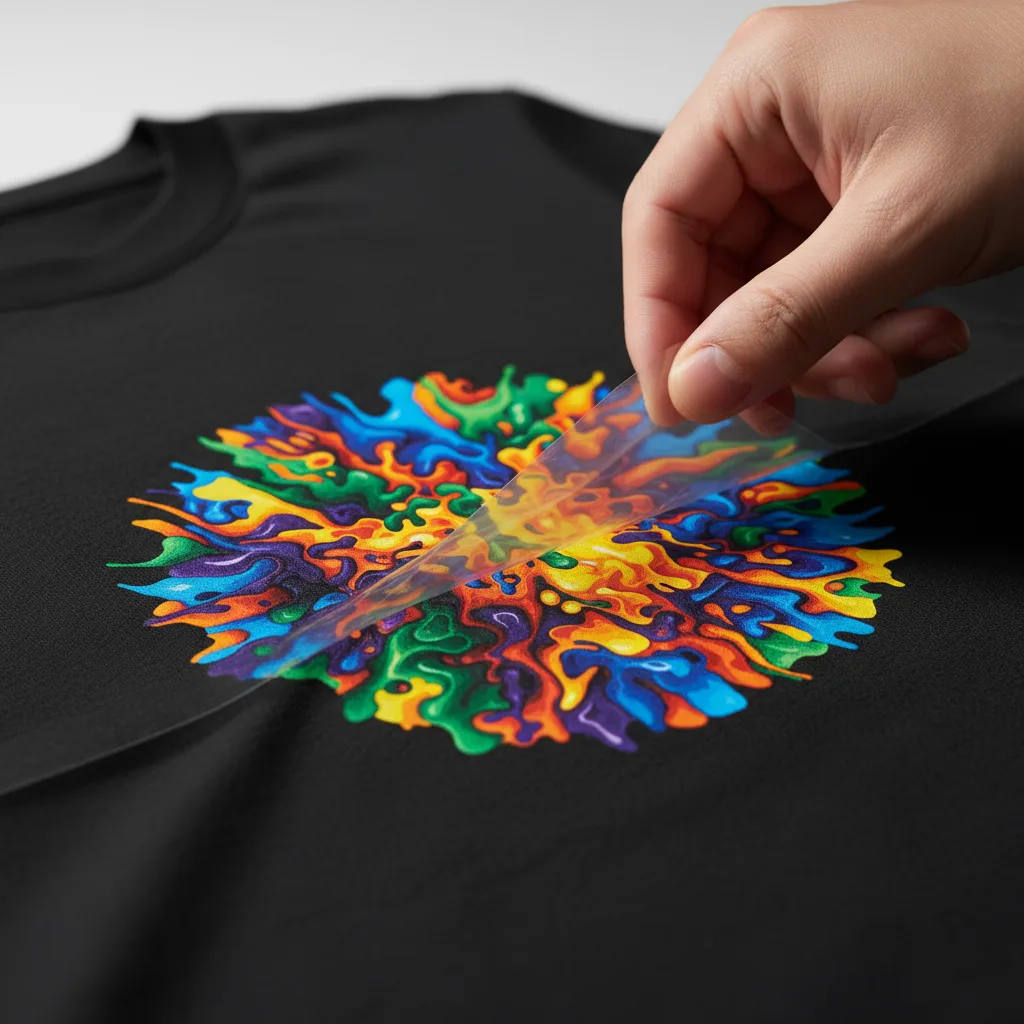
Hot Peel vs Cold Peel
DTF transfers are either hot peel or cold peel — this is specified by the transfer supplier. ColorFuse Prints transfers are cold peel unless otherwise noted.
Cold Peel (Our Transfers)
Wait 10–15 seconds after the press opens for the transfer to cool before peeling. Then peel the film slowly and steadily from one corner at a low angle — pull parallel to the fabric surface rather than straight up. If any part of the design begins to lift with the film, lay the film back down and re-press for 5 more seconds.
Hot Peel
Hot peel transfers are peeled immediately after the press opens, while still warm. Peeling too slowly or waiting too long can cause the ink to stick to the film instead of staying on the fabric. If a supplier specifies hot peel, work quickly and confidently.
The Finishing Press
After peeling the film, perform a finishing press for the best long-term durability:
- Place a Teflon sheet or parchment paper over the design
- Press for 5 seconds at the same temperature with medium pressure
- Remove and allow to cool
The finishing press does two things: it further bonds any edges that may have slightly lifted during peeling, and it removes any shininess or tackiness from the surface of the print. The result is a cleaner, more professional matte finish.
Troubleshooting Common Problems
Design is peeling or lifting at edges
Cause: Insufficient pressure, temperature too low, or not pressing long enough.
Fix: Re-press the original garment (with a Teflon sheet over the design area) at slightly higher pressure for 15 seconds. If edges are not bonded, use heat-resistant tape to hold them down and re-press.
Transfer bubbling or not adhering in spots
Cause: Moisture in the garment. This is the most common problem with new-out-of-package blanks.
Fix: Always pre-press to remove moisture. If bubbling has already occurred, try re-pressing with a Teflon sheet. Prevention is far easier than correction.
Design came off with the film
Cause: Temperature too low, pressure insufficient, or peel attempted while still too hot (on cold-peel transfers).
Fix: Verify press temperature with an independent thermometer. Increase pressure. Wait longer before peeling.
Colors look faded or washed out
Cause: Temperature too high (burning the inks), or a sublimation transfer being used on the wrong fabric (sublimation transfers are often mistakenly pressed on dark cotton).
Fix: Verify you have DTF transfers (not sublimation). Check that your press temperature is not exceeding 325°F.
Transfer has a shiny or plastic-looking finish
Cause: Normal appearance before a finishing press.
Fix: Perform a finishing press with Teflon sheet for 5 seconds. This converts the glossy finish to a soft matte look.
Previous
Perfect Heat Press Settings for DTF Transfers: Temperature, Time, and Pressure
Next
DTF Transfers vs Sublimation: Which Is Right for Your Project?
Shop DTF Transfers
View all
DTF Transfers
Grunge Flag
High Quality DTF Transfers, Ready to press Heat Transfers

DTF Transfers
Gamers Life Ready-To-Press DTF Transfer
High Quality DTF Transfers, Ready to press Heat Transfers

DTF Transfers
Rawa means I Love You
Rawa means I Love You -- Heat-applied DTF transfer for cotton, polyester, and any color fabric. Soft-feel finish, no weeding required.

DTF Transfers
I'm the funny elf
I'm the funny elf -- Heat-applied DTF transfer for cotton, polyester, and any color fabric. Soft-feel finish, no weeding required.
Ready to press your next design?
Shop premium DTF transfers and sublimation products. No minimums. Ships in 2-3 business days.
Browse All Products